
Short answer
Before you start
- A Windows computer (Game Capture is Windows-only, so on a Mac you use macOS Screen Capture)
- A Twitch account
- The game you want to show, already open
- A webcam and mic if you plan to use them (optional)
Bring your setup to a 24/7 AI Streamer Coach
Ask Streamer Coach →Get personalized feedback to fix streaming issues and plan your next content.
Step by step
- 01
Download OBS and run the wizard
Watch this step on YouTube · 1:01 ↗If OBS has buttons everywhere and no tutorial tells you where to actually begin, I get it. Head to obsproject.com, pick your operating system and install it like any other app.
The first time you open it, the auto-configuration wizard pops up. Choose to optimize for streaming, with recording as secondary, and click Next. OBS tests your computer and your connection and picks the basic settings for you. If it asks you to connect Twitch, do it now or leave it for later.
What you should see: The wizard closes and you land on the main OBS window with one empty scene, the canvas already at the resolution it suggested.
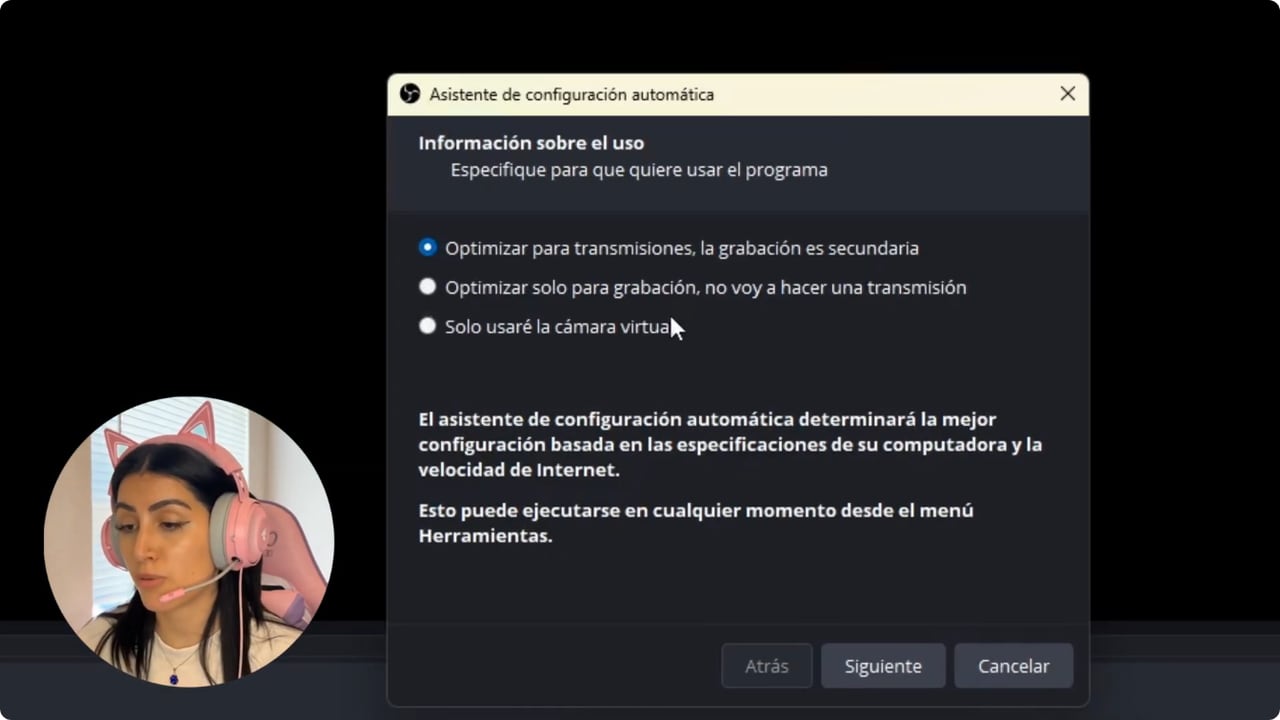
The tutorial shows the wizard that proposes a baseline for the computer and connection. YouTube · 1:31 ↗ - 02
Rename the scene and add Game Capture
Watch this step on YouTube · 1:31 ↗Right-click the first scene, choose Rename and call it Game. Then go to Sources, click the plus and choose Game Capture. Name it after the game you're playing.
Under Mode, pick Capture specific window instead of full screen. Some games just wouldn't show up in OBS for me in full-screen mode, and this avoids that. With the game already running, choose it from the Window list and click OK.
Game Capture is a Windows source, which is what Nicole uses. On a Mac, OBS says to use macOS Screen Capture instead.
What you should see: Game Capture shows up in your Sources list and the game appears on the canvas, still small.
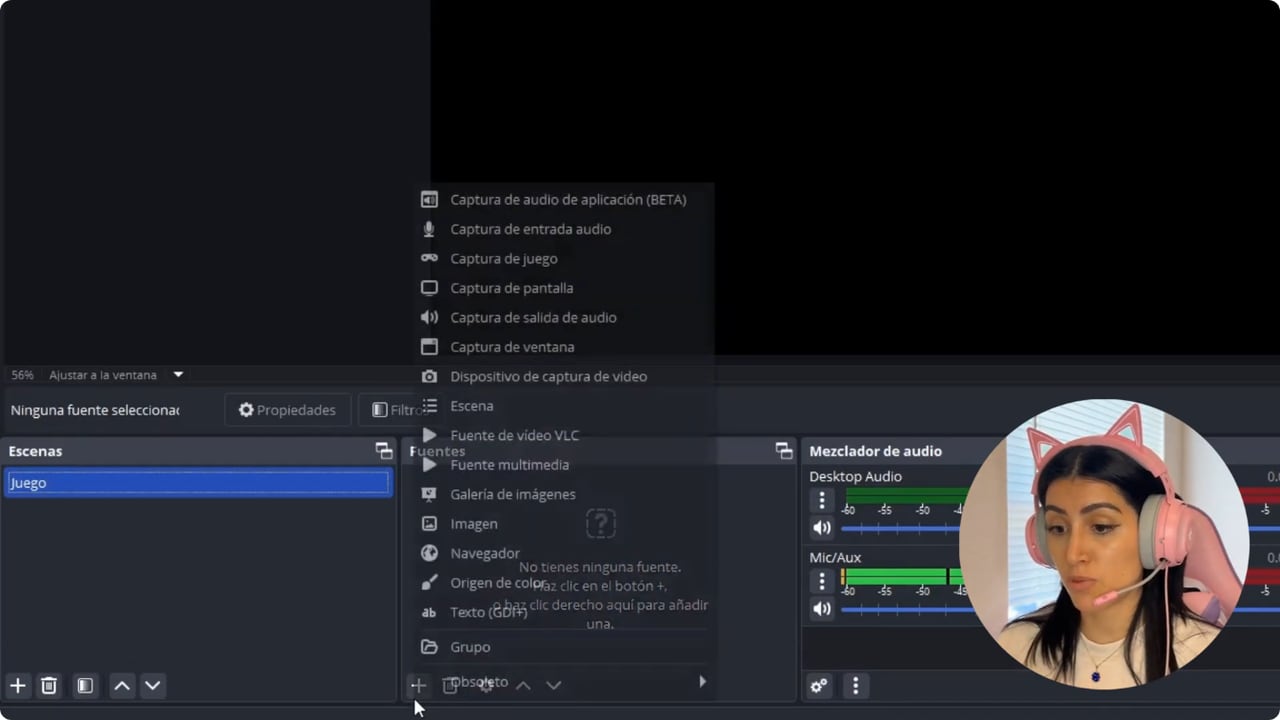
Game Capture appears in the source menu used to build the scene. YouTube · 2:12 ↗ - 03
Stretch the game to the edges
Watch this step on YouTube · 3:03 ↗Grab the little red handles in the corners and drag them to the edge of the canvas. They snap into place. Make sure no thin strips are left on the sides. Those mean you're losing part of your monitor's picture and viewers won't see it.
The snapping lives in Settings, General, Source Alignment Snapping. I'd leave it on.
What you should see: The game fills the whole canvas, with no black bars on the sides and nothing cut off.
- 04
Add your webcam and crop it with Alt
Watch this step on YouTube · 4:33 ↗In the Game scene, go to Sources, plus, Video Capture Device, and call it Camera. If it shows up huge and covering everything, shrink it from the red corners and move it to one side.
To crop it, hold Alt and drag an edge. Handy if your camera is very wide or there's stuff behind you that you'd rather not show. Put it somewhere that doesn't cover the health bar or anything viewers need to follow the game.
What you should see: A green line shows on the camera edge while you drag with Alt, and once you let go it sits in a corner, clear of the health bar.
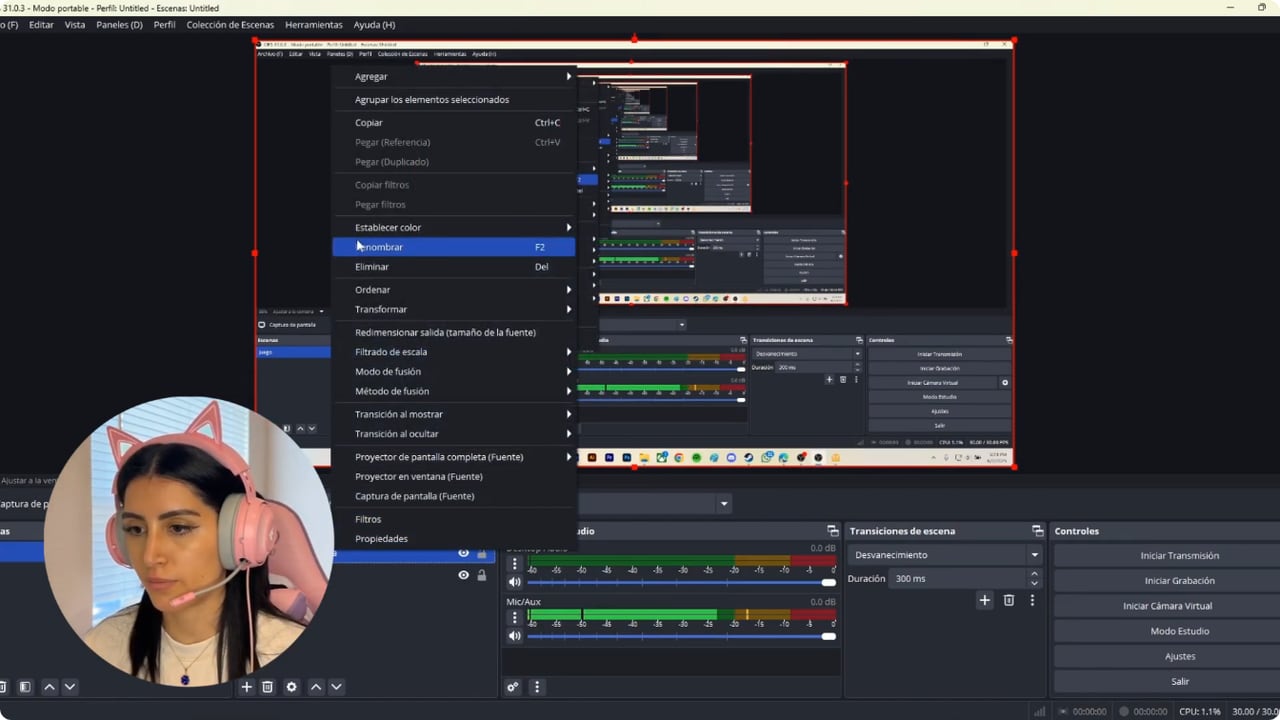
The camera is checked on the canvas before choosing its crop and position. YouTube · 4:23 ↗ - 05
Make a scene for just chatting
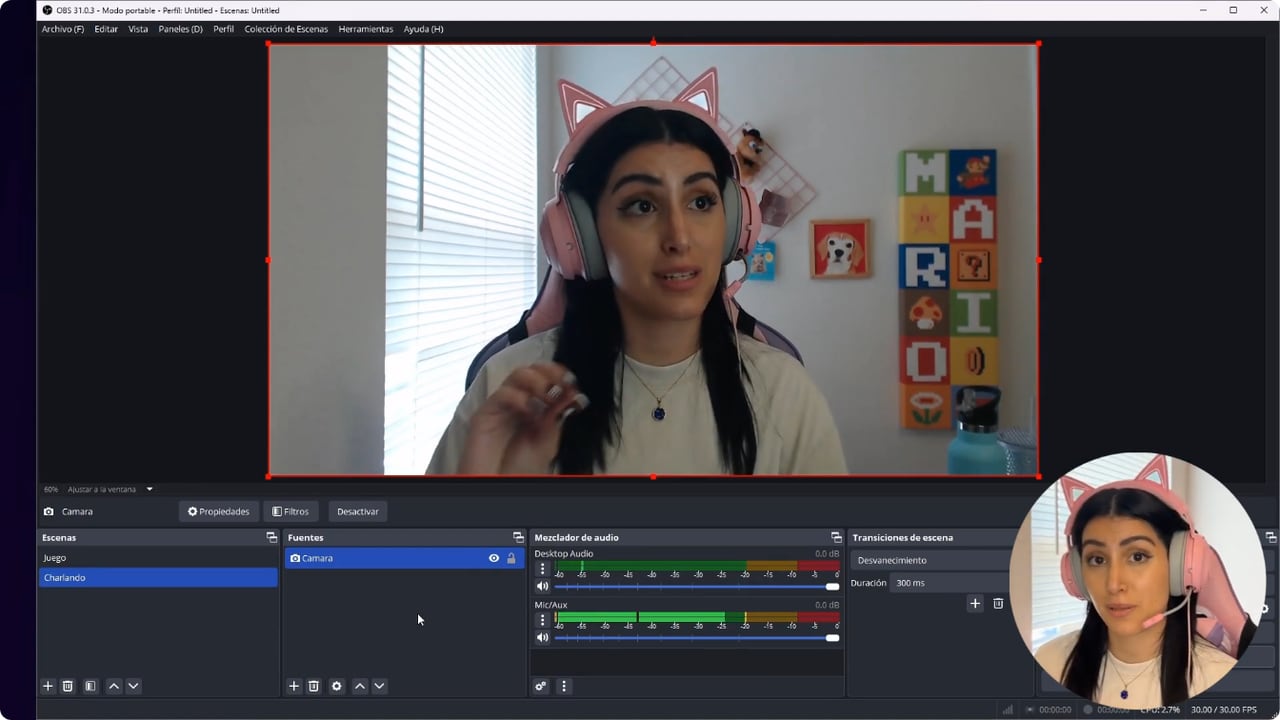
Watch this step on YouTube · 5:34 ↗It's not all gameplay. For saying hi or talking with your audience, create a second scene with the plus under Scenes. I called mine Chatting.
In Sources, choose Video Capture Device, but instead of Create new, pick Add Existing and select the camera you already set up. That way you don't duplicate it and it keeps the same settings. Switching scenes is one click in the Scenes list.
What you should see: Your Scenes list shows Game and Chatting, and clicking each one changes the canvas with your camera visible in both.
- 06
Pick your mic and test desktop audio
Watch this step on YouTube · 6:34 ↗Go to Settings, Audio, and under Mic/Auxiliary Audio change Default to your actual microphone, by name. Do it even if OBS already found it. Leave it on Default and sometimes a controller or another device sneaks into your audio. It also means every scene you create gets the same mic.
Now play some game sound and look at the Audio Mixer. You'll see two meters: your mic, and Desktop Audio, which is everything your computer plays. You'll fine-tune the levels based on what viewers tell you, because you often hear yourself fine when they don't.
What you should see: In the mixer, the Mic/Aux bar jumps when you talk and the Desktop Audio bar moves with the game, and neither sits in the red.
The mixer lets you check voice and desktop sound as separate signals. YouTube · 7:06 ↗ - 07
Connect Twitch and record a test
Watch this step on YouTube · 9:06 ↗Go to Settings, Stream, choose Twitch and click Connect Account. Once you sign in, OBS lets you see your live chat and your username on camera, so you integrate faster with the platform and your followers.
An extra that isn't in the video: before your first stream, click Start Recording, talk a little with the game playing, switch scenes halfway and stop after thirty seconds. Listen back with headphones.
What you should see: Settings, Stream shows your Twitch account as connected, and a chat dock appears in OBS.
- 08
Use copyright-free music and go live
Watch this step on YouTube · 9:37 ↗One last tip, and it matters. Music has copyright. Play Spotify in the background and that part of the video saved on your channel ends up silent. In the video Nicole says the VOD ends up muted. Today Twitch says it mutes only the portion where it detects copyrighted audio. Use royalty-free music instead. I found NCS (NoCopyrightSounds) by digging through Reddit. NCS asks for credit: put "Music provided by http://spoti.fi/NCS" in your stream description, and check its usage policy (ncs.io/usage-policy). Better safe than sorry.
Once that's sorted, click Start Streaming. OBS is ready for your first stream. Starting is a big first step.
What you should see: The button switches to Stop Streaming and the live timer starts counting in the bottom bar.
If something does not work
- Game Capture shows a black screen
- Open the source properties and set Mode to Capture specific window, with the game already running. If it's still black, try Display Capture, keeping in mind it shows your whole monitor and works your computer harder. Game Capture only exists on Windows: on a Mac use macOS Screen Capture.
- The game isn't in the window list
- OBS only lists what's already open. Launch the game first, then go back to the source properties and pick it under Window.
- Your webcam disappears behind the game
- Move the camera source up in the Sources list. OBS draws whatever is higher in the list on top, so the camera needs to sit above Game Capture.
- Viewers say they can't hear you, or the game drowns you out
- You hear yourself fine because you get the sound directly. They don't. Pull Desktop Audio down a bit in the mixer, raise your mic and ask chat until they say it's even.
- Your Twitch VOD has no sound
- Twitch mutes the portions of a VOD where it detects copyrighted audio, such as background music. Switch to royalty-free music for your next streams.
Test before you go live
- Your webcam doesn't cover the health bar or anything viewers need to see.
- When you test the audio, your voice is clear over the game.
- Your mic is selected by name, not left on Default.
- Switching scenes doesn't flash black or freeze the camera.
- Any background music is royalty-free and credited in the description.
- Twitch chat is visible without leaving OBS.
Cómo configurar OBS para streaming en 10 minutos
Watch the full tutorial (in Spanish) ↗Common questions
Should I use Game Capture or Display Capture?
If you're only showing the game, use Game Capture. Display Capture shows your entire monitor, and capturing the whole screen often slows down both your computer and your stream. Save it for when you want to show other things, like a video.
How do I crop my webcam in OBS?
Select the camera source, hold Alt and drag one of its edges. OBS marks the crop with a green line. Let go when only what you want to show is left.
Do I need a Stream Deck to switch scenes?
No. Nicole doesn't have one either. Click the scene in the Scenes list, or set keys in Settings, Hotkeys, where you'll also find start and stop streaming.
Can I play background music on stream?
Yes, as long as it's royalty-free. With copyrighted music, like whatever's on your Spotify, Twitch mutes the part of the VOD where it detects it. Libraries like NCS exist for exactly this, and NCS asks you to credit it in the stream description.
Should I copy the resolution Nicole uses?
No. Start with whatever the wizard picked for your computer and connection. If it stutters when you test, lower the resolution or frame rate before going live.


