

Short answer
Before you start
- Your mic plugged in and selected in OBS
- Headphones, so you can hear yourself with the filters
- Your mic's brand and model
- Optional: a compatible Nvidia graphics card for its audio effects
Bring your setup to a 24/7 AI Streamer Coach
Ask Streamer Coach →Get personalized feedback to fix streaming issues and plan your next content.
Step by step
- 01
Pick the mic, position it right and max the gain
Watch this step on YouTube · 0:32 ↗Your mic sounds muffled and viewers ask if you're streaming from a cave. Let's fix that. Grab a cup of tea, open OBS and don't skip steps, or it can end up worse than before.
Go to Settings, Audio, and under Mic/Aux pick the mic you'll use. Then look up your model to see which side you talk into. Lots of mics are directional, and if yours is backwards you'll sound quiet. Set gain to 100% on the mic itself if it has a knob, and in Windows sound settings. Talk normally: the meter should sit between -15 and -10 dB, in the yellow and out of the red.
What you should see: When you talk normally, the Mic/Aux bar reaches the yellow, between -15 and -10 dB, without touching red.
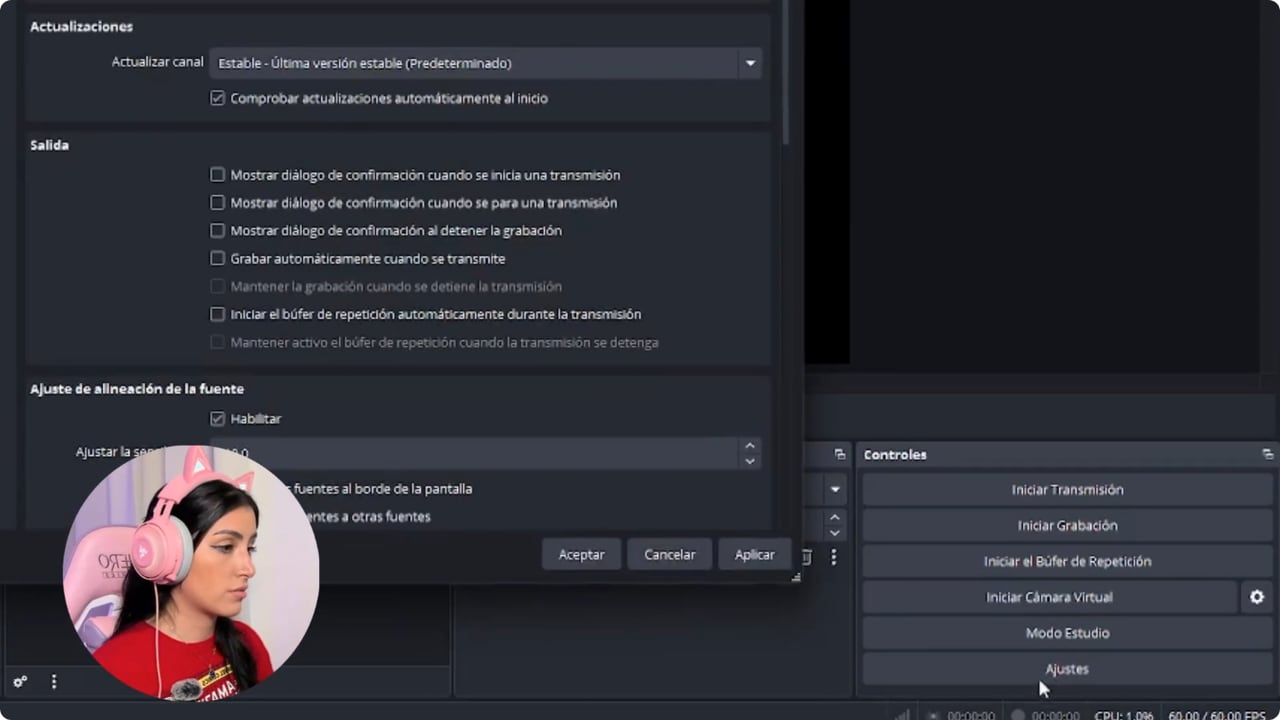
The first check is selecting the correct device before adding filters. YouTube · 0:53 ↗ - 02
Turn on monitoring so you can hear yourself
Watch this step on YouTube · 3:04 ↗To hear how each filter changes your voice, open the three dots on your mic in the mixer, Advanced Audio Properties, and set Audio Monitoring to Monitor and Output.
If you still can't hear yourself, go to Settings, Audio, Advanced, Monitoring Device, and choose your headphones instead of Default. Use headphones to hear yourself.
What you should see: Settings, Audio, Advanced lists your headphones as the monitoring device, and you hear yourself in them when you talk.
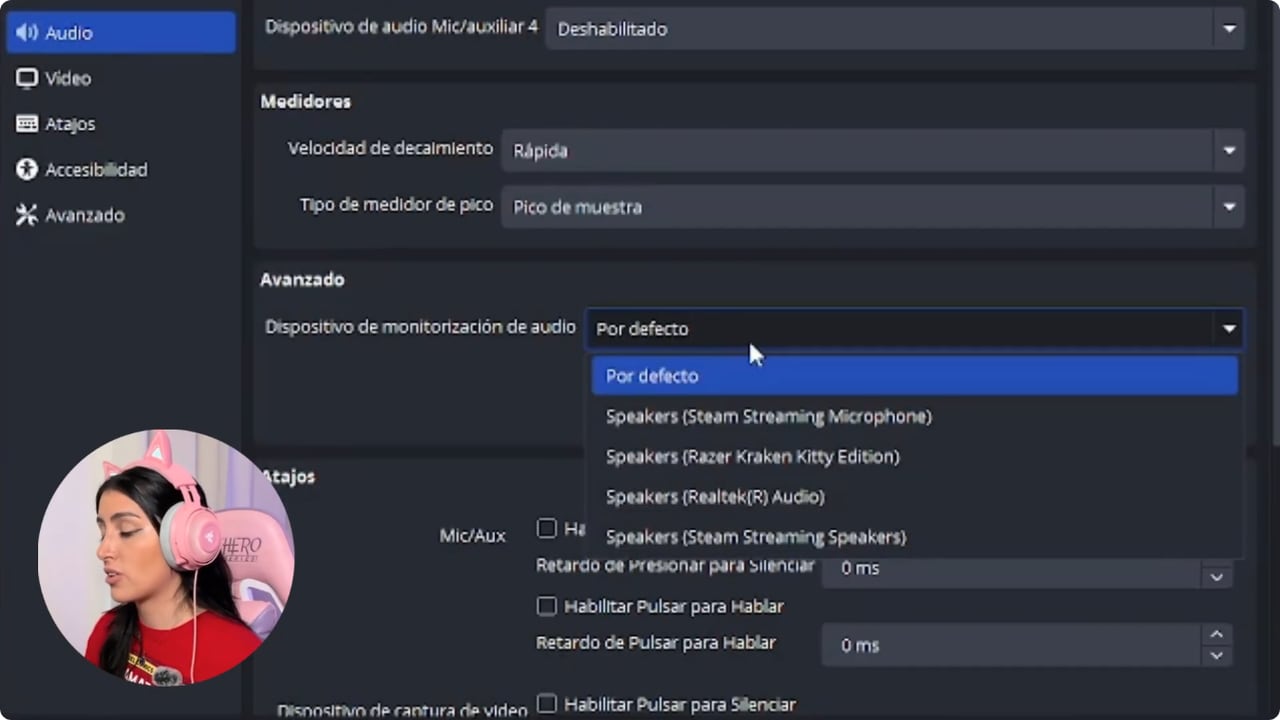
The tutorial frame shows where to choose the monitoring device in Audio settings. YouTube · 4:10 ↗ - 03
Add noise suppression first
Watch this step on YouTube · 4:38 ↗This filter takes down the fan, the air conditioning or the neighbors' dogs. Open the three dots on your mic, Filters, plus, Noise Suppression. Filters run top to bottom, so noise suppression has to go first: drag it up or use the arrow.
With a compatible Nvidia card, you can download the Nvidia Broadcast audio effects plugin from its page (Audio FX section, pick your card series), install it and restart OBS. In Nicole's OBS it appears as its own filter, NVIDIA Audio Effects, with three modes: noise, echo, or noise and echo. Try all three. Depending on your OBS version, NVIDIA can also show up as a Method inside Noise Suppression: OBS's page lists it that way and says it needs the NVIDIA Broadcast SDK. Without Nvidia, use Speex if your computer is older or struggles, or RNNoise, which cleans better but uses more CPU. Careful with intensity at max: your voice can turn robotic.
What you should see: When you go quiet, background noise barely moves the Mic/Aux bar, and your voice still sounds natural in your headphones.
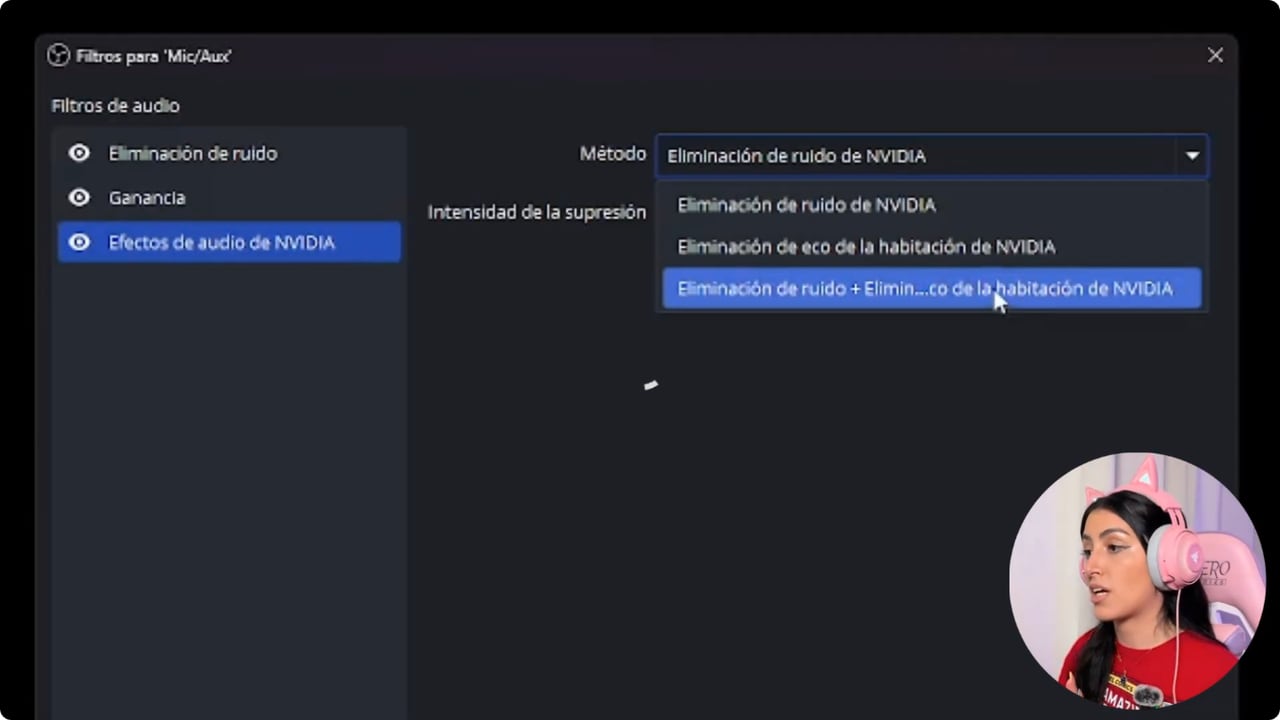
This frame shows the NVIDIA Audio Effects options used in the tutorial. RNNoise and Speex are separate choices. YouTube · 6:10 ↗ - 04
Shape your voice with the 3-band EQ
Watch this step on YouTube · 6:39 ↗Add the 3-Band Equalizer filter. Highs make your voice crisper, mids give it clarity and lows make it warmer.
I pulled the mids down a little and nudged the lows up, but that's what works for my voice. Move them a bit at a time while you listen. You want a subtle improvement, not to sound like a different person.
What you should see: The filter list shows 3-Band Equalizer below noise suppression, with your three values set.
- 05
Level your voice with the expander
Watch this step on YouTube · 8:12 ↗The expander and the compressor work as a team to level your voice. Whisper and they bring you up. Scream at a jumpscare and they hold you back so nobody goes deaf. Add Expander first: three dots, Filters, plus, Expander. Move the Threshold until a whisper comes through but the keyboard doesn't, testing with the keyboard and whispering. For me -35 dB works both ways. Then handle Output Gain: lower it until normal speech stays out of the red, while a whisper is still heard.
What you should see: With the Threshold in the right spot, the meter rises when you whisper and barely moves when you type.
- 06
Add the compressor
Watch this step on YouTube · 9:14 ↗The compressor takes your super loud sounds and brings them down so nobody's headphones blow up. Add Compressor, plus, Compressor. Set Ratio to 3, Release to 100 ms and Attack to 2 ms. Start with Threshold all the way right and bring it down until even laughing or talking loudly keeps the bar between -15 and -10, before the red. You'll tune this yourself, listening with headphones.
What you should see: When you laugh or talk loudly, the Mic/Aux bar stays between -15 and -10 without reaching red.
- 07
Finish with a limiter at -10 dB
Watch this step on YouTube · 10:45 ↗Add Limiter, plus, Limiter, which Nicole leaves as the last filter. It works like a door: set Threshold to -10 dB and your voice won't go higher than that. That's what keeps your decibels from shooting up.
What you should see: The filter list ends with Limiter, its Threshold at -10 dB.
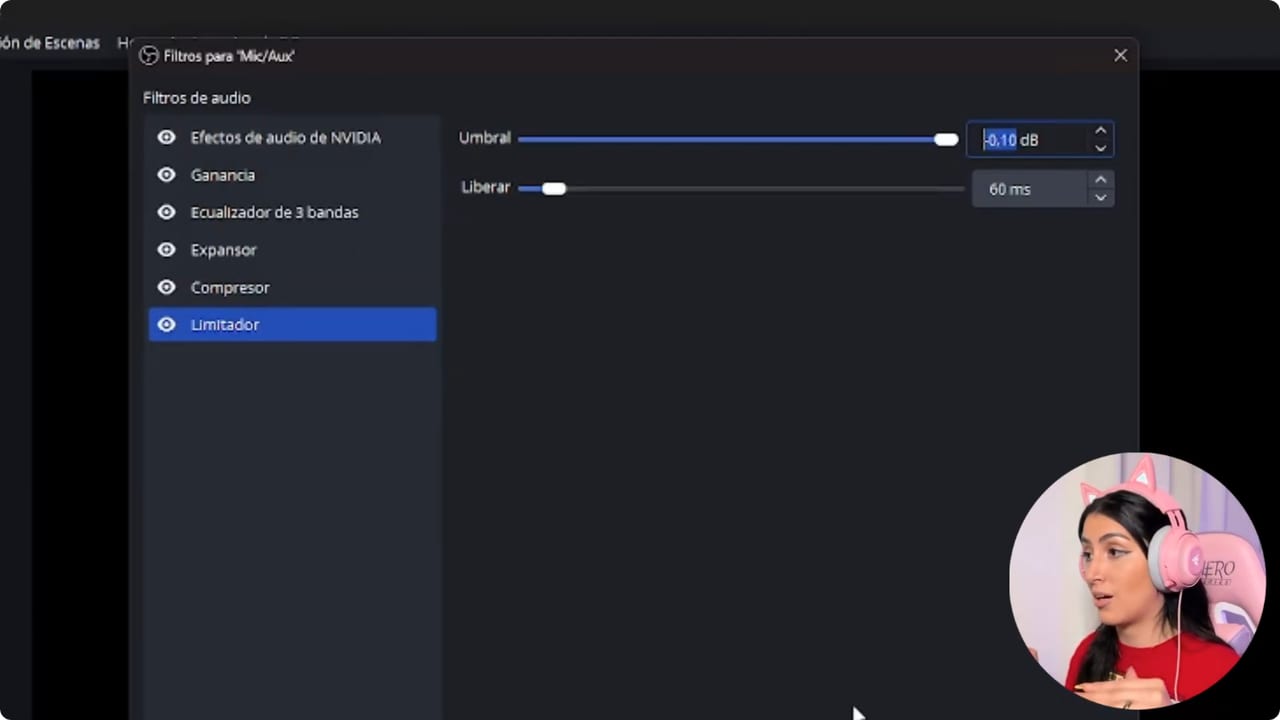
The verified frame shows Limiter selected at the end of the tutorial chain. YouTube · 11:10 ↗ - 08
Test it all: whisper, talk and shout
Watch this step on YouTube · 11:16 ↗With headphones on, whisper, talk normally, laugh and shout a bit. You should still hear the difference between a whisper and a shout, with the bar never going past -10 dB.
An extra that isn't in the video: if hearing yourself bugs you while streaming, set the mic back to Monitor Off in Advanced Audio Properties. With this, your mic sounds professional without paying for sketchy plugins or expensive gear.
What you should see: During the whisper-and-shout test the bar rises and falls but never goes past -10 dB.
If something does not work
- Your voice sounds robotic or metallic
- Noise suppression is too strong. Lower the intensity until you sound natural again, or try a different suppression method.
- You still sound quiet after turning everything up
- Look up your mic model and check which side you talk into. If it's still low with gain at 100% on the mic and in Windows, add a Gain filter.
- You can't hear yourself in your headphones
- Make sure the mic is on Monitor and Output, and that Settings, Audio, Advanced has your headphones as the monitoring device instead of Default. Click Apply and talk again.
- The keyboard still comes through
- Raise the expander Threshold a little at a time until typing stops moving the bar, without cutting off your whisper. If the mic sits right next to the keyboard, move it.
- NVIDIA Audio Effects doesn't show up
- Fully close OBS after installing the plugin, then reopen it. Depending on your OBS version, NVIDIA shows up either as its own filter (NVIDIA Audio Effects, under the plus) or as a Method inside Noise Suppression: check both places. OBS says the NVIDIA method needs the NVIDIA Broadcast SDK.
Test before you go live
- Your mic is selected by name under Mic/Aux.
- Gain is at 100% on the mic and in Windows.
- Noise suppression is the first filter in the list.
- Your voice isn't robotic or choppy in a test recording.
- Keyboard and fan noise are barely there when you're quiet.
- Monitoring is set the way you want it for the stream.
Cómo mejorar tu micrófono en OBS con filtros de audio gratis
Watch the full tutorial (in Spanish) ↗Common questions
What order do mic filters go in OBS?
Filters run top to bottom, and noise suppression has to go first. Nicole then adds the 3-band EQ, expander, compressor and limiter, in that order. That order is her recipe, not an OBS rule.
What level should my voice hit?
Normal speech should sit between -15 and -10 dB, the yellow part of the meter. The limiter at -10 dB keeps a shout from going past that.
Speex, RNNoise or Nvidia?
If you have a compatible Nvidia card, try its audio effects. If not, RNNoise cleans better but uses more CPU, and Speex suits older computers or ones that struggle with games.
Should I copy your exact values?
Use them as a starting point. Your mic, your room and your voice are different, so adjust while listening in headphones. If a value sounds off, trust your ears over the number.
Do I need the Gain filter?
Probably not. Use it only if your voice is still low with gain at 100% on the mic and in Windows. Check first that you're talking into the right side.


