
Short answer
Before you start
- A Twitch account
- Streamlabs Desktop from the official site (the free plan is enough)
- Your webcam and microphone plugged in
- The game you'll stream, open before you capture it
- Your phone or a second screen to watch your own stream
Bring your setup to a 24/7 AI Streamer Coach
Ask Streamer Coach →Get personalized feedback to fix streaming issues and plan your next content.
Step by step
- 01
Install Streamlabs, connect Twitch and create a Chatting scene
Nicole, installing and connecting Streamlabs ↗You want to stream on Twitch and OBS is staring back at you with a thousand settings. Relax, Streamlabs is the easy way in. Go to the Streamlabs site, download Streamlabs Desktop and sign up with your email. On the plans screen, choose Join with free. Once it installs, open it, pick Live streaming, connect your Twitch account and click Authorize. When it offers to import OBS scenes, choose Start fresh, select your webcam and microphone, and skip the themes, since a lot of them are paid. Finally, click + under Scenes and add one called Chatting.
What you should see: Streamlabs opens with the preview at the top, Chatting in the scene list and the audio mixer on the side.
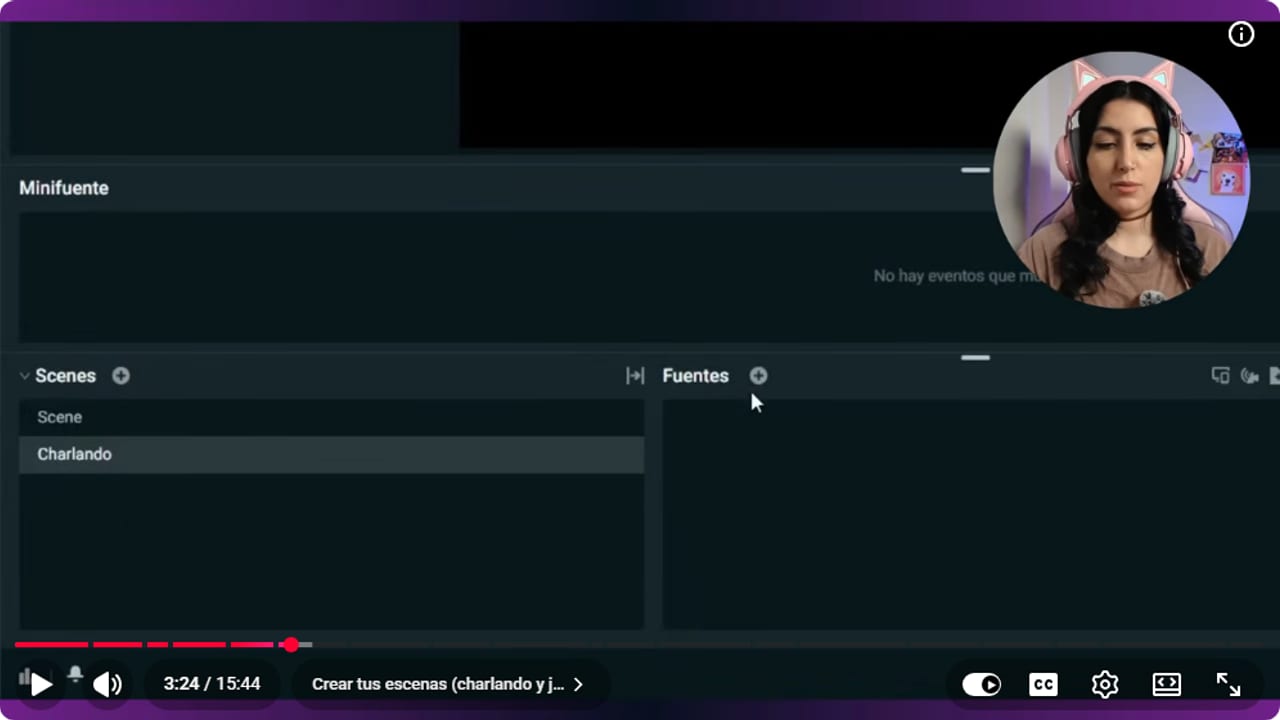
The Chatting scene exists and is ready for camera, chat, and alert sources. YouTube · 3:24 ↗ - 02
Add your camera to Chatting
Nicole, Chatting scene ↗With Chatting selected, click + under Sources and choose Video Capture Device. If you picked your camera during setup, it's already listed. If not, add it from the list. Then shrink it and move it to leave space for chat.
What you should see: Your face shows in the preview, at the size and position you set.
- 03
Add the Chat Box and Alert Box
Nicole, chat and alerts ↗Under Sources, add Chat Box. Pick a style: box, Twitch-style, old school or Chunky. In the same settings, hide bot messages from things like Nightbot and hide commands, so they don't clutter the screen. If you use BetterTTV emotes and you're not an Affiliate yet, turn them on here so they display. Next, add Alert Box, double-click it and set up each event: follows, subs, bits, raids and donations, each with its own image, sound and text. Hit play to preview every alert.
What you should see: The source list shows Alert Box, Chat Box and your webcam as separate items, and the test alert plays in the preview.
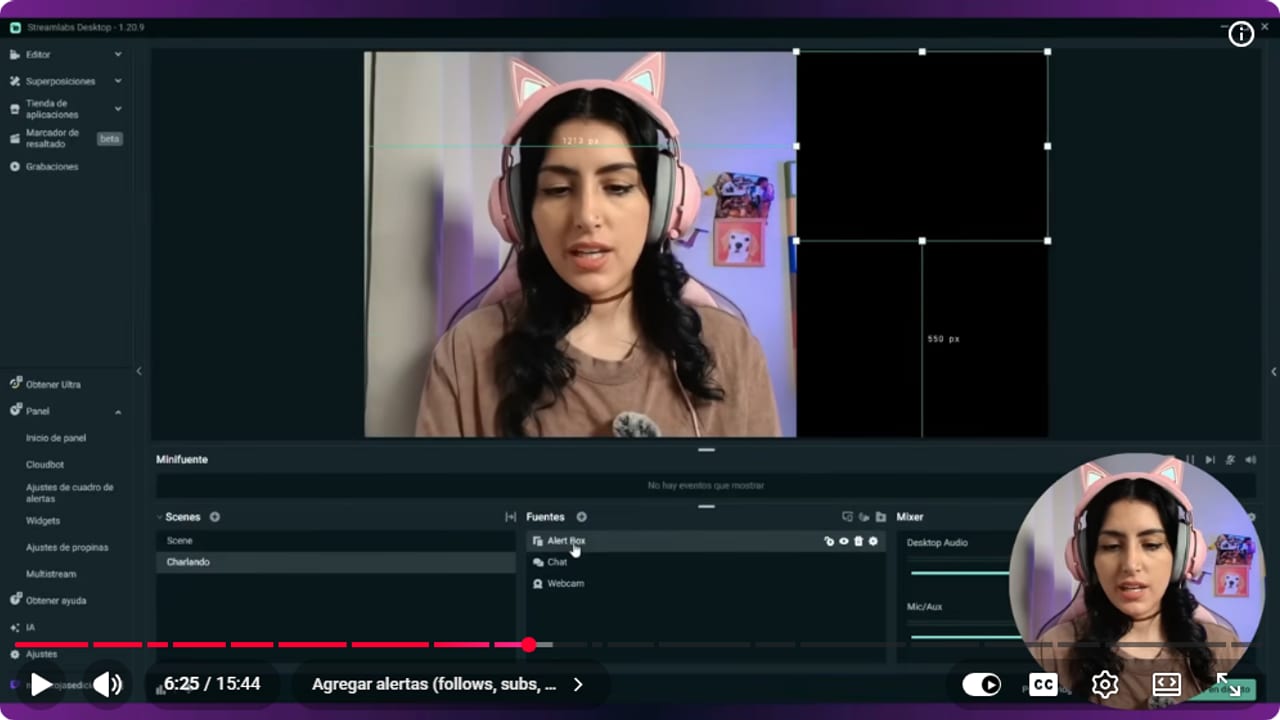
Alert Box, Chat, and Webcam appear as separate sources you can order in the scene. YouTube · 6:26 ↗ - 04
Order the layers and crop with Alt
Nicole, source order ↗Source order decides what sits on top. Whatever is higher in the list shows above the rest, so if your camera fills the screen and chat sits below it in the list, chat vanishes behind your face. Drag chat and alerts above the camera. To crop, hold Alt and drag an edge. It's great for the camera, but don't do it to chat, because you can chop off usernames or the end of messages.
What you should see: Chat and alerts sit on top of the camera with nothing hidden behind it.
- 05
Build the Gameplay scene with Game Capture
Nicole, game capture ↗Open your game first. Then click + under Scenes and create Gameplay. Under Sources, add Game Capture and you'll see the capture modes: automatic, any full-screen application, specific window, and foreground window with a hotkey. If you switch games a lot, use Specific window and pick the game's window. If you always play the same thing, automatic or full screen is fine.
What you should see: The game fills the canvas in the Gameplay scene preview.
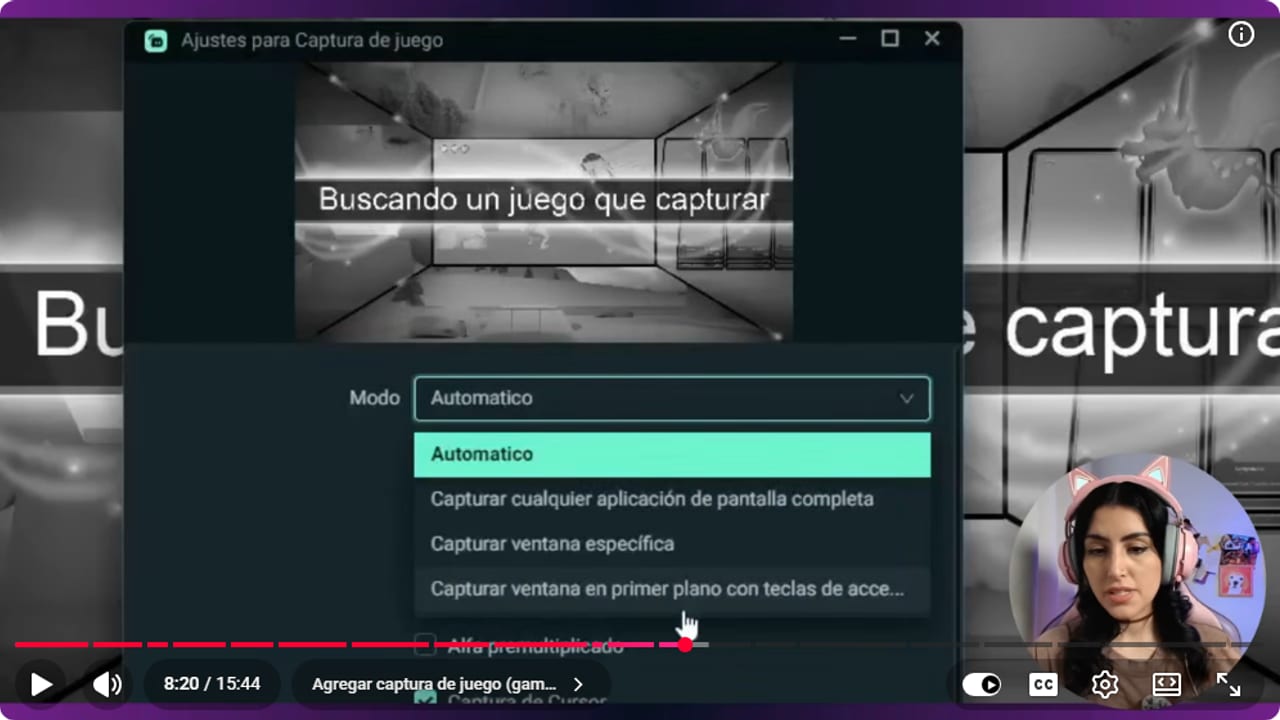
The menu offers automatic, full-screen, specific-window, and foreground-window capture modes. YouTube · 8:21 ↗ - 06
Looks a bit bare? Add a free overlay
Nicole, free overlays ↗Streamlabs comes with ready-made overlays. Go to Overlays in the scenes area and filter for free ones. Watch out for anything marked Included with Ultra, which is the paid plan. Pick a free one, click Select and install, then swap the sample camera and game for yours.
What you should see: The installed overlay adds new scenes to your list, with its design showing in the preview.
- 07
Turn on title confirmation and check your accounts
Nicole, title confirmation and accounts ↗In Settings, General, tick Confirm stream title and game before going live. That way Streamlabs asks for your title every time you start, and you can change it right there. Then, under Stream, make sure your Twitch account is connected. In the video Nicole says multistreaming in Streamlabs needs a plan upgrade. Today the Streamlabs free plan streams to one horizontal and one vertical platform at the same time. Going live horizontally on several platforms needs Ultra, so if you want that without paying, do it from OBS.
What you should see: Settings, Stream lists your Twitch account as connected.
- 08
Set output, audio and video
Nicole, output, audio and video (10:18) ↗In Settings, Output, switch to Advanced. Under Streaming, choose NVIDIA NVENC H.264 (or whichever encoder shows up for you), constant bitrate and 6000 kbps. Nicole says that's what Twitch allows for now, and in its broadcasting guidelines Twitch recommends it for 1080p60 (4500 for 720p60). Under Audio, set 44.1 kHz and stereo. Leave the desktop audio device on Default, or Disabled if you split your audio channels, and set the auxiliary mic to your microphone by name. Under Video, the base resolution is your monitor's. If your internet or PC struggles, lower the scaled output resolution. Use the Lanczos filter and 60 FPS as an integer value.
What you should see: When you talk, only your mic meter moves, and the desktop meter reacts to game sound.
- 09
Optional: set up hotkeys
Nicole, hotkeys ↗In Settings, Hotkeys, you can assign shortcuts to switch scenes and start or stop the stream. Then you don't have to jump back into Streamlabs mid-game. It's the same thing plenty of streamers do with a Stream Deck.
What you should see: Pressing your shortcut switches the preview from Chatting to Gameplay.
- 10
Go live and watch yourself on your phone
Nicole, confirming the broadcast ↗Click Go Live. The stream info appears: title, category, tags, content classification and the accounts you're streaming to. Check it and click Confirm and go live. Open your channel on your phone, or on a second monitor if you're blessed with one, and chat or play for about 5 minutes while you check how it looks and sounds. And that's it, your Streamlabs stream is up and running.
What you should see: Your phone shows your channel live, with your camera, your chat and the title you confirmed.
If something does not work
- Chat disappears when the camera fills the screen
- That's source order. Chat sits below the camera in the list, so it's hidden behind it. Drag it above the webcam and it comes back.
- Chat cuts off usernames or the end of messages
- You probably cropped it with Alt. Remove the crop and resize chat from the corners without Alt, so the text wraps instead of getting chopped.
- Game Capture shows a black screen
- General guide advice, not a fix Nicole shows in the video (she does say to open the game first and use Specific window): open the game before adding the source and use Specific window to pick it from the list. If you play something different every day, change the window in the source properties.
- You picked a nice overlay and it wants money
- If it says Included with Ultra, it's on the paid plan. Filter for free ones under Overlays, or design your own overlay for free in Canva.
- The stream stutters or freezes
- Lower the scaled output resolution so your PC and connection can breathe. If it keeps happening, work out whether it's your internet, CPU or GPU before changing anything else.
Test before you go live
- Twitch is connected and Streamlabs asks for your title before every stream.
- Chatting shows camera, chat and alerts with nothing covered.
- Gameplay shows the game and you can switch scenes smoothly.
- Your voice comes through once and the game doesn't drown it out.
- Nothing you installed says Included with Ultra by accident.
- Your test stream looks right on your phone. Starting is a great first step.
Cómo streamear en Twitch con Streamlabs desde cero
Watch the full tutorial (in Spanish) ↗Common questions
Is Streamlabs free?
Yes, it has a free plan, and this whole guide uses it. Some themes, overlays and features like multistreaming to several horizontal platforms need the paid Ultra plan, so check the label before you install anything.
Streamlabs or OBS?
Streamlabs gets you started fast because chat, alerts and overlays come ready to go. OBS gives you more control and plenty of free tools that Streamlabs charges for. My take: Streamlabs to start, OBS to keep growing.
Can I import my OBS scenes?
Yes, during setup Streamlabs offers to import scenes from OBS or Twitch. If you're brand new, starting fresh helps you understand what each source does.
What bitrate should I use for Twitch?
6000 kbps with constant bitrate. Nicole says that's what Twitch allows for now, and Twitch recommends it for 1080p60 (4500 for 720p60). Going higher just makes your computer work harder.
Why should I watch my own stream on my phone?
It's the only way to see what viewers see: whether the audio's right, the alerts show up and the chat is readable. Talk for a few minutes while you check, and if a friend drops by, even better.


