

Short answer
Before you start
- Clips from your streams, ideally downloaded as vertical clips from Twitch
- CapCut for desktop (there's a phone app too). Nicole shows everything in the free version
- Optional: CapCut Pro for noise reduction and a few settings marked with an icon
- Optional: memes, GIFs or music you want to add
Bring your setup to a 24/7 AI Streamer Coach
Ask Streamer Coach →Get personalized feedback to fix streaming issues and plan your next content.
Step by step
- 01
Download the vertical clip from Twitch
Nicole Rojas · YouTube · 0:30 ↗Rewatching three hours of stream to find the good bits is a slog. That's what clips are for. Go to Creator Dashboard, Content, Clips. You'll find the clips you or your community made. Click Share and choose Download vertical version. The upside: nothing to install and no syncing your camera to the gameplay. The downside: someone has to clip it during the stream, whether that's you, a tool or a very generous friend. If you don't have time to rewatch everything, Opus Clip finds moments with AI. In the video Nicole calls it a paid tool. Today its pricing page shows a limited free plan with a watermark, plus paid plans.
What you should see: The clip is saved on your computer as a vertical video, with your camera and the game already laid out.
- 02
Create a project and import your clips
Nicole Rojas · YouTube · 3:00 ↗Download CapCut from its website, install it and open it. Click Create project, and skip the mini tutorial if it pops up. Import your clips, plus any memes, images or your logo. Drag the videos onto the timeline at the bottom. If you have the same moment from two angles, say from a Stream Together with a friend, stack one clip on top of the other, right-click and choose the option to sync video and audio.
What you should see: Your clips sit on the timeline and the player shows the first one in vertical.
- 03
Cut the boring bits with the B key
Nicole Rojas · YouTube · 4:01 ↗A good clip is basically a trailer for your stream. Watch the whole thing, and wherever nothing's happening, move the playhead there and press B to split. Move to where the action picks up, split again, select the middle piece and delete it. With the main track magnet on, the clips snap together. Turn it off and you get a gap, which shows up as literal black screen.
What you should see: The timeline shows several pieces butted up against each other with no black gaps.
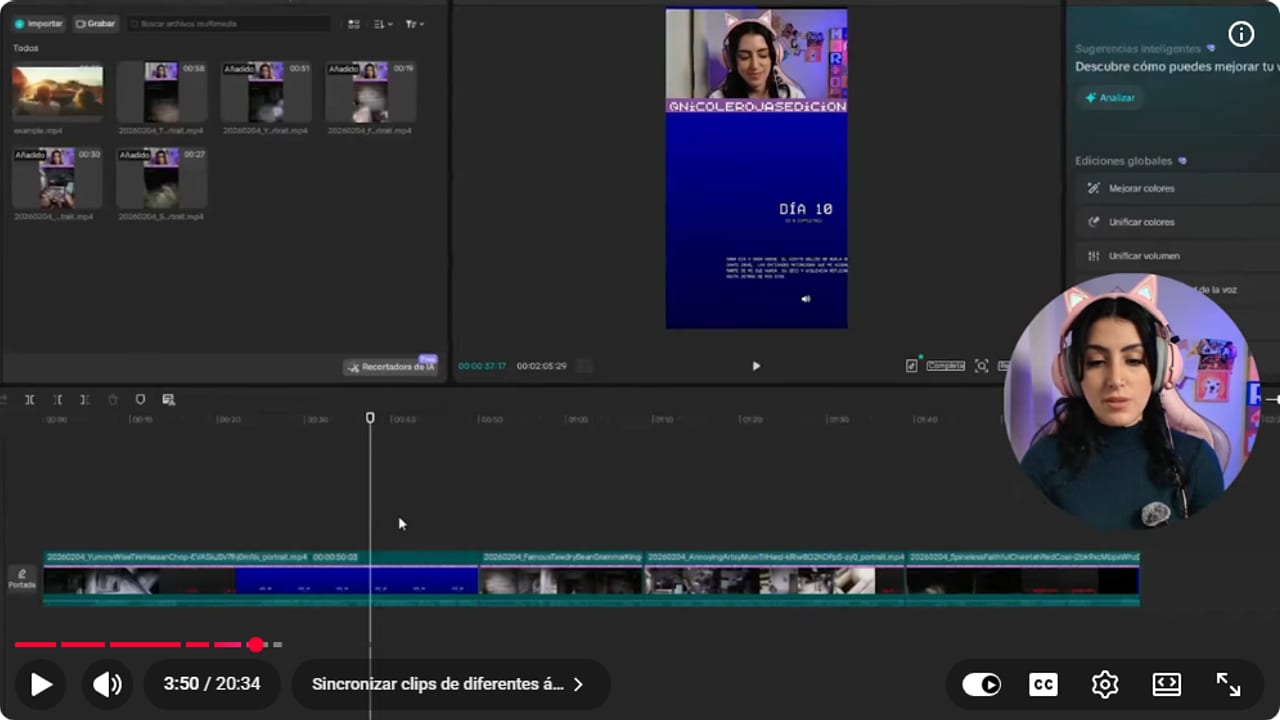
The timeline collects the moment's cuts before text and movement are added. YouTube · 3:51 ↗ - 04
Improve the picture and the sound
Nicole Rojas · YouTube · 5:01 ↗Select the clip and open Adjust. Settings with an icon belong to CapCut Pro. Nicole has Pro, but she shows it in the free version. If the image is dark, raise exposure to somewhere between 10 and 15. Contrast at 10 and saturation around 5 usually work without making things look wild. Toggle the adjustment on and off to compare. If you like it, save it as a preset, and only use Apply to all when every clip comes from the same camera. Then, under Audio, drop your voice to -5 if it's loud, or raise the game if you can't hear it. Noise reduction is a Pro feature, but she says you don't need it: raising and lowering the volume is enough. For a compilation from several streams, select them all and normalize the loudness.
What you should see: Your face and the game look clearer, and the volume doesn't jump between clips.
- 05
Generate captions and check them against the audio
Nicole Rojas · YouTube · 7:33 ↗Captions aren't optional. I scroll straight past reels without them myself. Go to Text, Auto captions, choose the language and click Generate. If it shows a Pro icon, see the question about whether CapCut is free below. Then listen to the whole clip and fix whatever the AI got wrong, especially people's names and game names, which it struggles with in Spanish.
What you should see: A caption track appears on the timeline and every line matches what's being said.
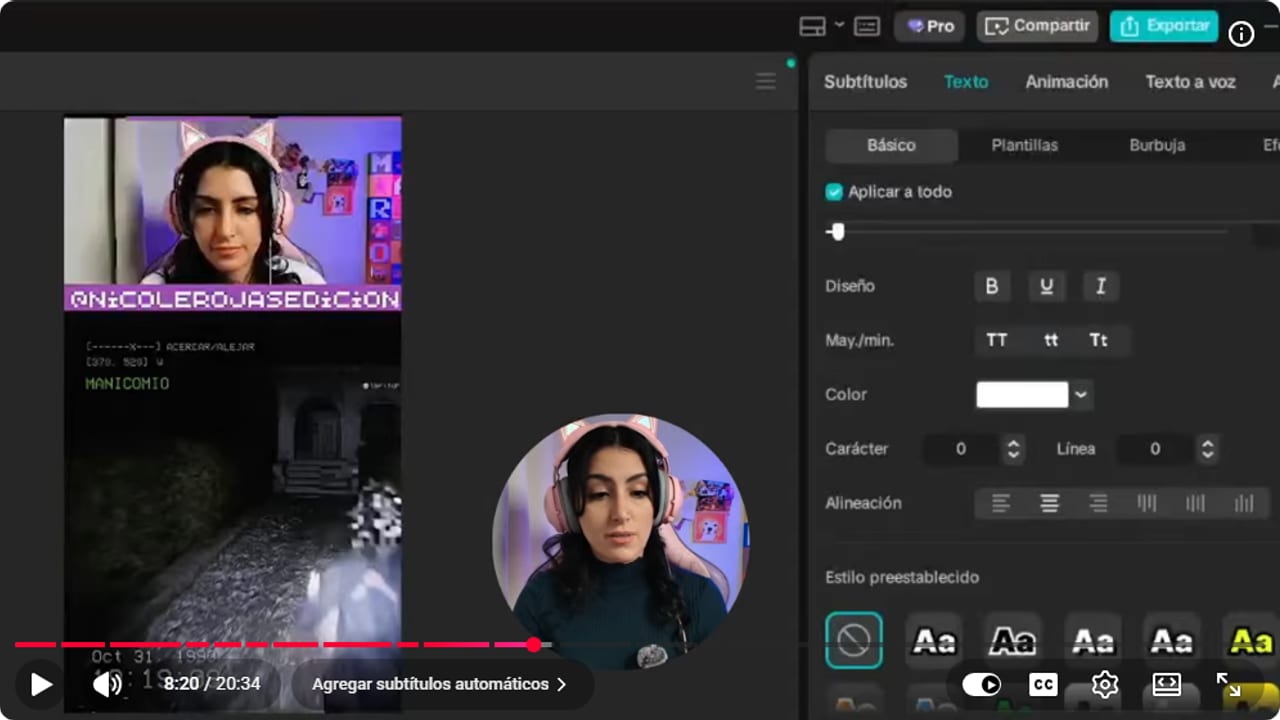
Captions are generated first, then corrected against the original audio. YouTube · 8:21 ↗ - 06
Style the captions so people can read them
Nicole Rojas · YouTube · 8:04 ↗Pick a template close to your look, then tweak it under Basic. Use Impact (it's free) or something similar, in caps, white, with a black shadow. The big one: add a stroke, because that's what keeps captions readable on any background. Size them so they're readable without covering the gameplay. And keep it to two or three words per line. Click into the text and add a space where you want the line to break.
What you should see: Captions show in white with a stroke, two or three words at a time, clear of the gameplay.
- 07
Add memes, music and sound effects
Nicole Rojas · YouTube · 10:07 ↗Memes add personality, just don't drop 3,000 of them every 5 seconds. Stickers has trending stickers and GIFs, and Effects has face effects for jump scares. For music, open Audio, pick something copyright-free and drop it to -20 or -25 so it sits under your voice and the gameplay. Sound effects go on the exact moment, around -10.
What you should see: Memes and effects land on the funny moments, and the music plays under your voice and the game.
- 08
Add a transition and a keyframe zoom
Nicole Rojas · YouTube · 14:11 ↗To move from one clip to the next, open the Transitions tab and pick something short, like a glitch. You don't need one on every cut. For a zoom on your reaction, put the playhead where it starts, click the diamond under Video, Basic, Transform, move to where it ends, add another keyframe and raise the scale.
What you should see: Two keyframe diamonds appear on the clip, and playback pushes in on your face at the reaction.
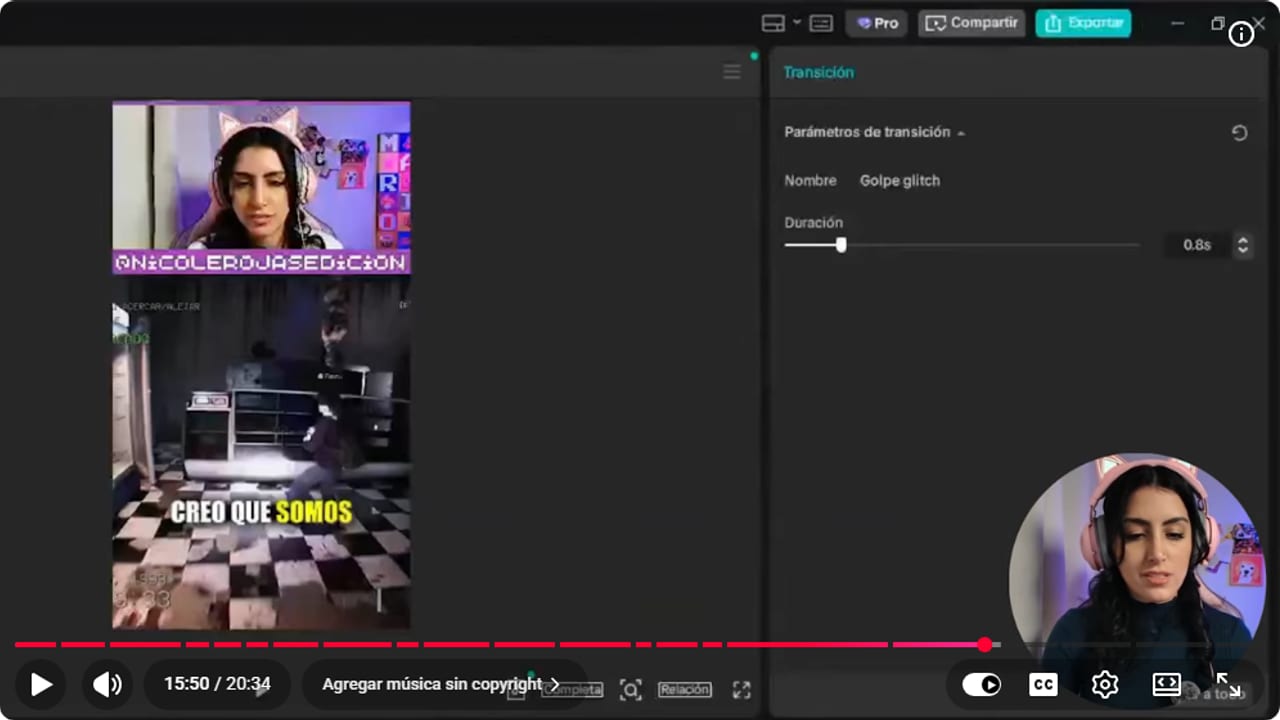
Keyframes change position or scale between two specific points in the clip. YouTube · 15:51 ↗ - 09
Export at 1080 x 1920
Nicole Rojas · YouTube · 17:15 ↗Click Export. Give it a name you'll find later, like clip week one or the date, and choose a folder. Set the resolution to 1080 x 1920 (higher if your clip is), bitrate to Recommended, codec H.264, format MP4, and 30 or 60 frames per second to match how you streamed. Before exporting, use the TikTok preview to make sure the app's buttons don't cover your captions or your face.
What you should see: The export window shows 1080 x 1920, H.264 and MP4, and the finished file appears in your chosen folder.
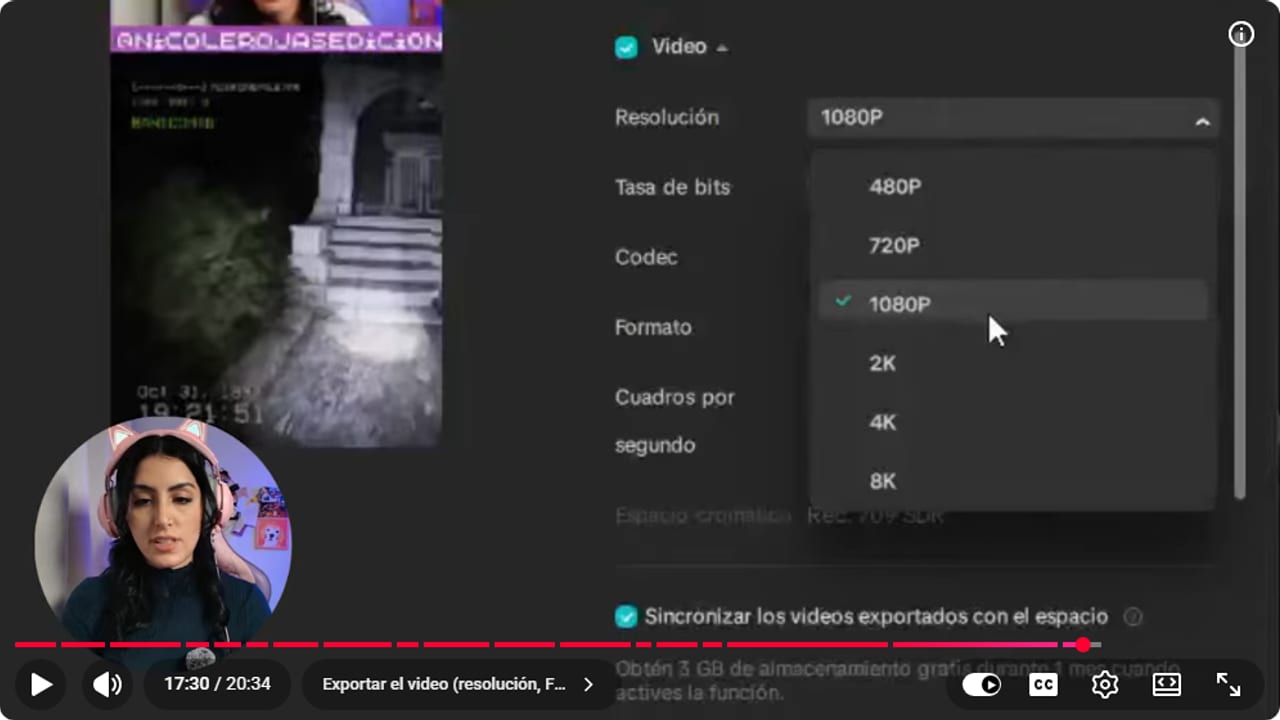
Export shows resolution, bitrate, codec, and format before saving. YouTube · 17:31 ↗ - 10
Schedule one clip a day
Nicole Rojas · YouTube · 18:15 ↗CapCut can post directly, but I'd upload by hand and schedule. Save the clips to your computer and schedule them by day and time: YouTube Studio for Shorts, Meta Business Suite for Reels and Facebook, and TikTok Studio for TikTok. That gives you one video a day for the week, even if you're on holiday. And that's it, your clips are edited and posting themselves.
What you should see: Each platform lists your clips as scheduled, one per day.
If something does not work
- Captions look doubled or you can't read anything
- Pick a caption template and adjust it under Basic. Impact, white, a black shadow and, above all, a stroke.
- Captions misspell names
- The AI trips over people's names and game names, especially in Spanish. Listen to the whole clip and fix every line by hand before exporting.
- You deleted a section and got a black screen
- The main track magnet was off. Turn it on so clips snap together, or drag the next clip over to close the gap.
- Volume jumps up and down between clips
- It happens when you mix clips from different streams. Select them all and normalize the loudness, so nobody has to keep fiddling with their phone volume.
- You applied your color to everything and your friend's clip looks off
- Every camera looks different, so Apply to all isn't always the answer. Save your adjustment as a preset and apply it only to your own clips.
- The music drowns out your voice
- Drop the music to -20 or -25 and listen again. If it's still in the way, lower it further or raise your voice track.
Test before you go live
- The clip jumps straight to the good part, no dead minutes.
- People's names and game names are spelled right in the captions.
- Music sits under your voice and the gameplay.
- Memes support the moment and don't show up every 5 seconds.
- In the TikTok preview, the app buttons don't cover your captions or face.
- This week's clips are scheduled. And that's it, now wait for the views.
Cómo editar clips de stream para Reels y TikTok en CapCut
Watch the full tutorial (in Spanish) ↗Common questions
Is CapCut free?
In the video Nicole has CapCut Pro but shows the free version, and options with an icon are Pro, like noise reduction. Raising and lowering the volume is enough to make audio sound good. For auto captions, CapCut's own pages disagree: its captions guide says you can make them for free, while its Standard vs Pro comparison lists the auto caption generator as exclusive to Pro. If you see the Pro icon, your version decides.
Where do I get clips if nobody made any during the stream?
You can upload the stream to an AI tool like Opus Clip and ask it to look for laughs or screams. In the video Nicole calls it a paid tool and says its captions aren't very editable. Today its pricing page shows a limited free plan with a watermark, plus paid plans. Use it to find the moments and do the editing in CapCut.
How many words should each caption line have?
Two or three at most. They read faster and stay out of the gameplay's way.
How loud should background music be?
Between -20 and -25, so it doesn't fight your voice or the game. Sound effects can go higher, around -10, because they mark one specific moment.
How often should I use transitions?
You don't need one on every cut. Use them between clips or for a dramatic beat, and keep them quick, because viewer attention barely lasts a couple of seconds.
What are keyframes for?
Zooming in on your reaction or following someone on screen. In my case, showing my face when a car ran me over in a game where I didn't even know cars existed.


